You’ve just noticed a scratch on your favorite leather handbag, and your heart sinks. But don’t worry, it’s not the end of the road for your cherished accessory. With a bit of know-how, you can breathe new life into it and make it look as good as new.
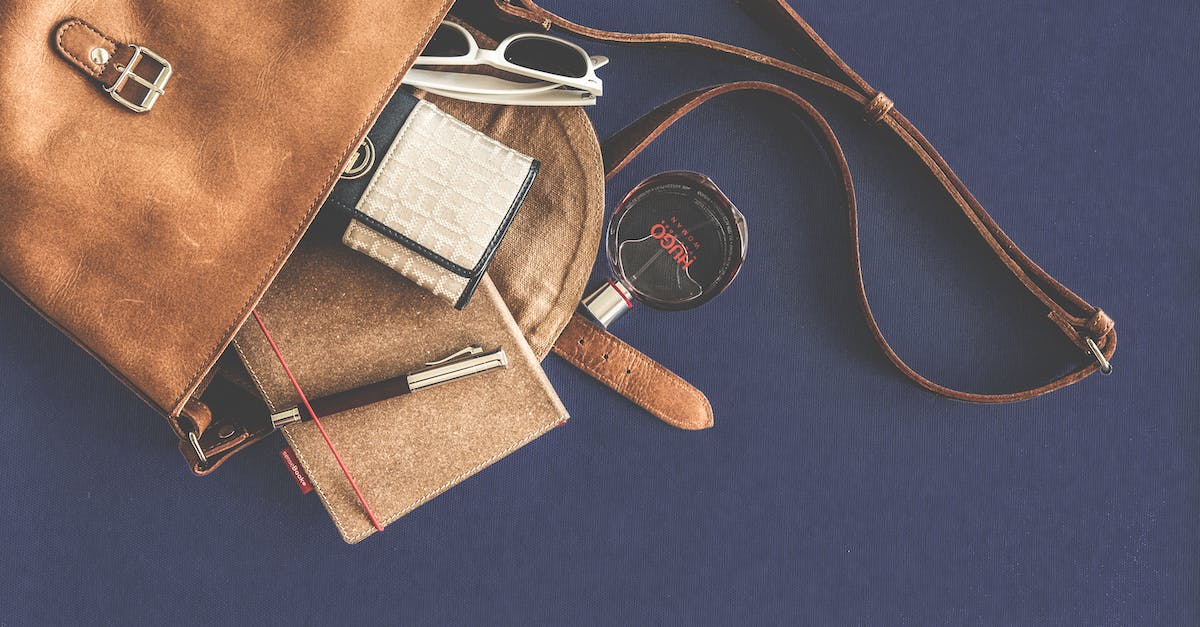
Leather is a sturdy material, but it’s not immune to wear and tear. Whether it’s a scuff, tear, or a faded spot, there’s usually a fix for every mishap. You’re about to discover some simple, yet effective tricks to fix your leather handbag right at home.
Assess the Damage
Before you dive into the rescue mission for your leather handbag, it’s essential to evaluate what you’re up against. Scratches, scuffs, tears, and faded spots each require a different approach. Start by cleaning the bag; it’s much easier to see the damage when the leather is free of dirt and grime.
Scratches are the most common and easiest to fix. Light scratches merely rough up the surface, while deep ones can be more challenging. For scuffs, they’re typically superficial but make your bag look worn out. Tears are the most serious and might necessitate a professional touch if they’re sizable. Faded spots often occur from prolonged exposure to sunlight or harsh chemicals and can affect the bag’s aesthetics.
Here’s how you can assess the damage:
- For scratches: gently run your finger over them. If your finger catches, the scratch is deep.
- For scuffs: look for discoloration or peeling. Minor scuffing often just affects the finish.
- For tears: measure their length. Less than an inch can often be treated at home.
- For faded spots: check if the color difference is drastic. Light fading can be rejuvenated easily.
After assessing the damage, you’ll have a clearer idea of the extent of repair needed. Don’t be discouraged by what seems like substantial damage. Remember, there are simple fixes for almost every problem, and with the right care, your leather handbag can look as good as new. Next, you’ll need to gather the tools and materials required for the specific types of repair you’ve identified. Make sure to test all products on an inconspicuous part of the handbag to ensure they won’t cause additional damage to the leather.
Clean the Handbag
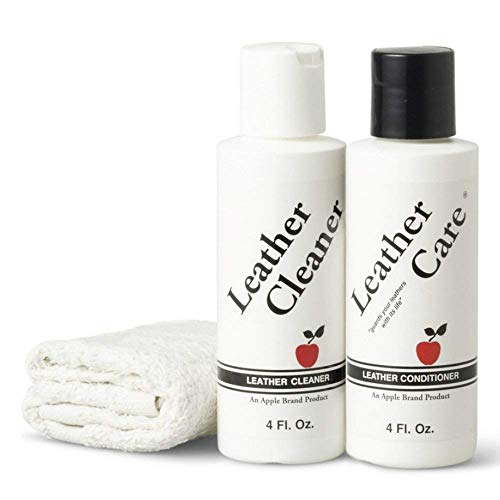
Before diving into repairs, ensure your leather handbag is clean. Dirt and oils can block adhesives and dyes from taking hold, so proper cleaning is crucial. Start by wiping the surface with a soft, dry cloth to remove loose contaminants. If you’re dealing with a particularly dirty spot, you might need to use a leather-specific cleaner.
When choosing a leather cleaner, avoid products with harsh chemicals. These can strip natural oils and damage the leather. Instead, opt for a gentle formula designed for leather care. Apply a small amount of cleaner to a microfiber cloth and rub the area in a circular motion. Don’t soak the leather, as too much moisture can lead to warping or staining.
After cleaning, it’s vital to let the handbag dry completely. Steer clear of heat sources like hairdryers or direct sunlight; they can cause the leather to dry out and crack. Natural air drying is the safest method. Once it’s dry, touch the leather. It should feel supple, not stiff or sticky, which would suggest a residue left behind.


For stubborn stains, consider a specially formulated leather stain remover. Just as with the cleaner, test this on a hidden part of the handbag before full application. Tackle stains as quickly as possible since the longer they set, the harder they are to remove.
Finally, once the bag is clean and dry, use a conditioner. A quality leather conditioner replenishes the essential oils lost over time. Apply a thin layer evenly, allowing the leather to absorb it fully before using the bag again. This step not only preps the leather for further repair work but also keeps the material at its best.
Moisturize the Leather
Once your handbag is clean and dry, it’s imperative to moisturize the leather. Think of leather like your skin; it needs hydration to stay supple and avoid cracking. Leather conditioner is your handbag’s best friend. Pick one that’s quality-made and designed for the type of leather you’re treating. Whether it’s a spray or cream, the right conditioner can make all the difference.
Before you apply the conditioner, make sure you’ve chosen a product suitable for your handbag’s leather. Different leathers respond uniquely to conditioners. For example, a patent leather conditioner may not be ideal for suede. Always check the label and stick to products designed specifically for your handbag’s leather type.
To apply the conditioner, use a soft cloth. Dab it into the product and gently rub it onto the handbag in circular motions. Make sure to cover every inch, but avoid over-saturating the leather. A thin, even coat will do the job. Less is more—you can always apply a second coat if necessary.
After conditioning, let your handbag sit undisturbed. The leather needs time to absorb the conditioner just like your skin needs time to absorb lotion. Depending on the product, this could take anywhere from a few minutes to several hours. Read the instructions for the specific time frame.
Keep in mind that moisturizing your leather handbag is not a one-time event. It’s a crucial part of your handbag maintenance routine. Depending on how often you use the bag and the climate you live in, aim to condition the leather every three to six months. Regular conditioning will help your leather handbag resist wear and tear, ensuring it continues to look chic and elegant for years to come.
Remember to spot test the conditioner on a small, inconspicuous area of your handbag before fully applying. This will ensure that the conditioner doesn’t alter the color or texture of the leather. Your handbag is an investment, and proper care will keep it looking luxurious.
Fix Scratches and Scuffs
When you’re faced with scratches and scuffs on your leather handbag, don’t panic. Minor scratches can often be buffed out using a soft cloth and leather cream. For deeper scratches, a leather repair kit is your best bet.
Start by cleaning the area gently. Apply a small amount of leather cleaner to the scratch using a soft cloth. Rub the cleaner in circular motions until the scratch is no longer visible.


« Purse vs Satchel: Unveiling the Surprising Differences
How to Clean Gold Hardware on Handbags: Simple Steps for Sparkling Results »
Next, you’ll want to apply a colorant from the leather repair kit that matches your bag’s leather. Here’s how:
- Apply a small amount of colorant with a sponge.
- Gently dab the scratched area.
- Allow it to dry completely.
Leather dye can also be an option for very noticeable scratches. However, it’s essential to match the dye color precisely to your handbag. Test the dye on a less visible part of your handbag first.
For scuffs, use a leather conditioner to hydrate the leather. Often, this will be enough to blend in the scuff mark. If the mark persists, look to a leather recoloring balm. Use it as follows:
- Select the balm closest in color to your handbag.
- Apply a small amount to the area.
- Buff it with a soft cloth.
Always remember to test any product on an inconspicuous spot before a full application. Regular treatment with a conditioner can prevent scuffs and scratches from setting deeply into the leather. Also, keeping a leather repair kit handy will ensure you’re prepared for quick fixes.
It’s worth noting that some bags develop a patina over time, which can add character. Light scratches might actually blend into this patina, becoming part of your bag’s unique story. However, you’ll want to address deeper damage promptly to maintain the handbag’s integrity.
Repair Tears and Holes
When you’re facing a tear or hole in your beloved leather handbag, don’t despair. Quick action can save your accessory from further damage. Start by cleaning the area around the tear with a gentle, damp cloth to remove dirt and debris.
For small tears, adhesive leather patches are a go-to. You’ll find them in various colors to match your handbag’s leather. Cut the patch to size, ensuring it completely covers the tear, and adhere it following the manufacturer’s instructions. It’s essential to apply it neatly to minimize its visibility.
If the damage is more significant, you might need a leather repair kit. These kits come with a compound that fills in the hole, creating a surface level with the rest of the bag. Apply the compound, then use the texturing tools provided to mimic the leather’s grain. Once it’s dry, you can paint over the repair area to blend it in with the surrounding leather.
For holes, sewing might be the best option. If you’re not confident in your sewing skills, it’s best to take your bag to a professional leather repair service. They have the expertise to sew the leather correctly without causing additional damage.
Keep in mind that repairing tears and holes is delicate work. Even with the right materials, you need to be patient and precise. Always test any repair method on an inconspicuous area first. Remember that the goal is to make your handbag look as good as new—or at least, nearly new.
Your handbag is a statement piece, and maintaining its pristine condition is worth the effort. With the right repair techniques, your leather handbag can continue to make that statement for years to come.
Dye Faded Spots
When you’re faced with faded areas on your leather handbag, you’ve got options to bring back the vibrant color it once had. Your go-to solution here is leather dye, designed to penetrate and bond with leather fibers for a lasting finish.
First things first, clean the surface. You’ll need to remove any dirt or oils that could prevent the dye from adhering properly. Use a gentle leather cleaner and let the bag dry completely before proceeding.
Selecting the right leather dye is crucial. It’s best to match the dye to your bag’s original color. Leather dye comes in various forms; liquids and gels are the most common. Each has its application technique, so pick what you’re most comfortable with.
Before you start, test the dye on a small, inconspicuous area to ensure it’s the right color and it sets as expected. Once confirmed, apply the dye to faded spots using a small sponge or dauber. Work in circular motions to ensure even coverage.
Allow the dye to dry thoroughly, which could take a few hours. Some dyes might also require a second coat, so check the instructions and be prepared to repeat the process for a richer color. After the dye is fully dry, apply a leather conditioner to restore moisture and give your handbag a protective finish.
Remember, dyeing leather is permanent, so take your time. If you’re not confident in doing this yourself, consult a professional. With patience and careful application, you can have your leather handbag looking as good as new.
Conclusion
You’ve got all the know-how to tackle those pesky leather handbag issues now. Remember, whether it’s a minor scratch or a more daunting tear, the right tools and a bit of patience will go a long way. Don’t forget to give your handbag the love it deserves with a regular conditioning routine. With these tips, you’ll keep your favorite leather companion looking sharp and stylish for years to come. Happy repairing!
Frequently Asked Questions
How can I fix minor scratches on my leather handbag?
For minor scratches, gently rub a soft cloth with a bit of leather cream over the affected area in a circular motion until the scratch blends with the rest of the leather.
What should I use to repair deeper scratches on leather?
For deeper scratches on leather handbags, it is recommended to use a leather repair kit that matches the color of your bag for the best results.
How can I deal with scuff marks on leather?
For light scuff marks, apply a leather conditioner to help blend the mark into the leather. For more persistent scuffs, try using a leather recoloring balm.
What’s the best approach for repairing small tears in leather?
Adhesive leather patches are a suitable option for covering up small tears in leather handbags, offering a quick and simple solution.
How do I fix larger tears or holes in my leather handbag?
For significant damage like large tears or holes, a leather repair kit is preferred, or you can sew the area if you have the necessary skills for a more durable repair.
Can I dye faded spots on my leather handbag?
Yes, faded spots can be dyed using leather dye that matches the bag’s original color. Clean the surface, apply the dye with a sponge or dauber, let it dry, and then finish with leather conditioner.
Should I test leather care products before applying them to my handbag?
Always test any product on an inconspicuous spot on your leather handbag before applying it to the entire item to ensure it does not cause any damage or discoloration.