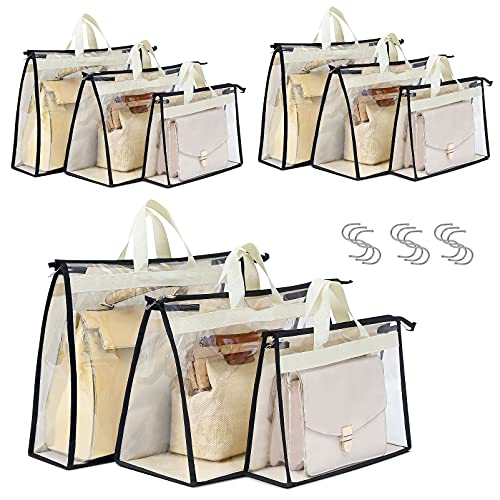
Ever found yourself rummaging through a bag full of zippers and clasps, thinking there’s got to be a simpler way? Well, you’re in luck! Crafting your own zipperless pouch is not only easy but also a fun way to create a unique accessory that’s all you.

Materials needed
Before diving into the creation of your handbag-type zipperless pouch, it’s essential to gather all the materials you’ll need. A well-prepared workspace ensures a smooth crafting experience.
Here’s what you should have on hand:
- Durable fabric: Choose one that complements your style and holds up to daily use. Consider materials such as canvas, leather, or thick cotton.
- Lining fabric: This adds a professional touch and helps protect the interior of the pouch.
- Interfacing: It gives structure to your pouch and prevents sagging.
- Magnetic snap: For a secure closure without the hassle of a zipper.
- Coordinating thread: Pick a color that compliments both your fabric and lining.
Measure and cut the following dimensions:
- Main fabric: Two pieces, 9″x6″ each
- Lining fabric: Two pieces, 9″x6″ each
- Interfacing: Two pieces, 8.5″x5.5″ each
Once all materials are prepared, clear a workspace for pattern layout, cutting, and sewing. Keep your tools within reach: fabric scissors, pins, a sewing machine, a hand-sewing needle, and an iron.
Remember to double-check the alignment of the magnetic snap components before installation. Misplacement can alter the look and functionality of your pouch.
Accurate cutting and consistent seam allowances are keys to a polished final product. Precision now pays off in the long run. With your materials ready and your tools at hand, you’re set to start crafting your zipperless pouch.
Choosing the fabric
When you’re ready to choose fabric for your zipperless pouch, there are key factors to consider. Durability and appearance are top priorities since your handbag will be both a functional item and a fashion statement.
Firstly, think about the purpose of your pouch. If it’s for everyday use, opt for heavy-duty fabrics like canvas or leather. These materials withstand frequent handling and contribute to the bag’s longevity. For a more luxurious touch, suede or velvet could make your pouch stand out, especially for evening wear.


The inside of your handbag matters just as much. The lining fabric should be smooth to protect the contents of your pouch and make items easy to find. Satin or cotton are popular choices for their sleek look and ease of cleaning.
Do not overlook the role of interfacing. This hidden gem adds structure to your pouch and ensures it keeps its shape. Medium-weight interfacing is versatile and effective for most handbag projects.
When picking colors and patterns, align with your personal style. Bold prints make a statement, while neutral tones offer versatility. Remember to ensure that your fabric choice matches the magnetic snap’s style you’ve selected.
- To Recap, Keep These Tips in Mind:
- Choose durable fabric for the exterior.
- Select a lining that’s protective and easy to clean.
- Use proper interfacing for added structure.
- Coordinate colors with your magnetic snap and overall style.
Carefully chosen fabrics elevate the quality and appeal of your handbag. By paying attention to these details, you’re setting yourself up for a successful and stylish zipperless pouch project.
Measuring and cutting
Once you’ve selected your fabrics, you’re ready to measure and cut. This step is critical for the structure and final look of your pouch. Precision is key, so take your time and measure twice to ensure accuracy.
Create your pattern or use a template that reflects the desired size and shape of your pouch. Standard pouch dimensions might start around 8 inches by 5 inches, but the choice is yours. Remember, your pattern dictates your project’s form, so your measurements need to be spot on.
Start with the exterior fabric. Lay it out flat and smooth out any wrinkles or creases. It’s crucial to keep the fabric grain consistent. Pin your pattern securely and cut carefully around the edges. For sharp, clean cuts, use fabric scissors or a rotary cutter and a cutting mat. Repeat the same process for the lining fabric and interfacing.
For the interfacing, you’ll cut it slightly smaller than the fabric pieces. This reduction compensates for the seam allowance and ensures a snug fit within your pouch. Generally, reducing the interfacing by about 1/4 inch all around works well.
When cutting the fabric for the magnetic snap tabs, leave some extra space around the tab area. This extra space allows for easier sewing and attaching of the snap without unwanted tension.
Finally, prepare the pieces for your magnetic snap. The snap will require a small cut in the fabric where it will be attached. Measure twice to find the center point and mark gently with fabric chalk. Use precision tools, like small sharp scissors, to make a clean cut for the snap components.


« How to Fix a Stuck Zipper on Handbag: Quick Solutions That Work
How Old Is a Vintage Handbag? Uncover Your Treasure’s True Age »
Keep all your cut pieces organized and ready for the next step: assembly. With your pieces cut to precision, you’re set up for a successful project. Remember, meticulous cutting leads to a more professional-looking pouch.
Sewing the pieces together
Once you’ve cut all the components for your pouch, it’s time to start sewing. Place the right sides of your exterior fabric pieces together.
Sew along the sides and bottom, leaving the top edge open. Go slow and make sure you’re consistent with your seam allowance. Repeat this process with the lining fabric, but remember to leave a gap at the bottom – you’ll need it to turn the pouch right side out later.
Attach the interfacing to the wrong side of the exterior fabric pieces according to the manufacturer’s instructions. This step provides your pouch with the necessary structure and support.
Next, it’s time to install the magnetic snap. Measure carefully to find the center of your fabric and mark the placement for the snap. Attach the snap to the lining fabric before you sew the sides together, making sure it’s secure and properly aligned.
With both your outer layer and lining crafted, place the outer pouch inside the lining with right sides together. Align the seams and edges smoothly. Sew around the top edge but keep in mind that gap you left in the lining.
Turn the pouch right side out through this gap. It might be fiddly, but patience pays off. Once right side out, push the lining inside the pouch and iron the edges for a crisp, professional look. Sew the opening in the lining closed, either by hand or with a very close edge stitch on your machine.
Topstitch the top edge of the pouch for a neat finish and to give extra strength where the magnetic snap will pull. If your fabric allows, opt for a decorative stitch to add flair.
Remember, straight, even stitches contribute to both the strength and beauty of your zipperless pouch. Check your thread tension and take the time to do it right.
Now that your pouch is taking shape, it’s increasingly clear how your selection of fabrics and attention to detail have contributed to its unique style and functionality. Keep a keen eye on symmetry and balance as you continue to bring your creation to life.
Creating the closure
Now that your pouch has shape, it’s time to add the crowning element: the closure. Without a zipper, a magnetic snap offers a chic and easy way to secure your belongings. First things first, place one half of the snap. It’ll sit on the inside of your pouch’s exterior fabric. Check the centered alignment with a ruler for precision.
Install the magnetic snap following the manufacturer’s instructions. Typically, you’ll cut small slits for the prongs, insert the snap, then secure it using the backing piece. Be sure to reinforce the area with a small piece of interfacing to prevent wear and tear.
Flip to the lining side now. It’s time to add the other half of your magnetic snap. Repeat the same process as with the exterior. Ensure both halves of the snap line up perfectly when the pouch is closed. This alignment is crucial for function and aesthetics.
Let’s handle the flap. If your design includes one, cut your flap piece the same width as your pouch. Customize the shape to match your style – pick from rounded, pointed, or straight edges. Sew the right sides of your flap fabric together, turn it right side out, then press.
Attach the flap to the back panel of your exterior piece. Position it carefully; the location determines how your pouch will close. Sew along the top edge, reinforcing with additional stitches to ensure durability.
Before moving forward, do a quick check. Ensure your magnetic snap functions smoothly and your flap aligns just right. Adjustments are easier to make now rather than later. Now that your pouch can close securely and stylishly, it’s ready for the finishing touches.
Adding finishing touches
Once your snap and flap are in place, it’s time to give your pouch that polished look. Edgestitching is your next step. You need to edgestitch around the flap and pouch opening. This strengthens these areas and adds a professional touch. Choose a thread color that complements your fabric or go with a contrasting shade for a bold statement.
Trimming stray threads as you work keeps your pouch looking neat. Even the smallest fray can distract from your craftsmanship, so keep those scissors handy.
Reinforcing the pouch’s stress points is a crucial step. Sew over these areas again or use bar-tacks to fortify them.
Attach the Lining to your exterior piece. Make sure right sides are facing each other and seam allowances are perfectly matched. Stitch them together, leaving a small opening for turning the pouch right side out. This gap should be just big enough for your hand to fit through. Once turned, press the edges to make them sharp and defined.
Topstitching is next. It gives a flat and finished look. Run a topstitch along the edge where the lining and the exterior meet.
To ensure your pouch stands up on its own, consider adding a base. Cut a piece of Stiff Material like cardboard or plastic and fit it into the bottom between the lining and exterior. This isn’t just for structure; it protects the bottom from wear and tear.
Here’s a quick checklist:
- Edgestitch the flap and pouch opening
- Trim all stray threads
- Reinforce stress points with additional stitching or bar-tacks
- Stitch the exterior and lining together
- Leave an opening for turning the pouch
- Press the edges after turning
- Topstitch for a neat finish
- Insert a stiff base for structure
Conclusion
You’ve now mastered the art of making your very own zipperless pouch! Remember, the devil’s in the details, so taking your time with cutting, seam allowances, and those finishing touches really makes a difference. Don’t forget to give yourself a pat on the back; not only have you created a unique accessory, but you’ve also honed your sewing skills. Enjoy flaunting your handcrafted pouch or gift it to someone special—they’re sure to appreciate the effort and love stitched into every seam. Happy crafting!
Frequently Asked Questions
What materials are needed to create a zipperless pouch?
To make a zipperless pouch, you’ll need durable fabric for the exterior, lining fabric, interfacing to provide structure, a magnetic snap for closure, and coordinating thread.
How important is workspace preparation?
Preparation of a well-organized workspace is crucial as it ensures all materials are within reach and provides a clean area to work, leading to better craftsmanship and a more enjoyable experience.
Why is accurate cutting important?
Accurate cutting is essential because it ensures that all pieces fit together correctly, leading to a polished and professional-looking finish on the zipperless pouch.
What are some finishing touches I can add to the pouch?
Finishing touches that can enhance your pouch include edgestitching around the flap and opening, trimming stray threads, reinforcing stress points, and attaching the lining to the exterior with topstitching. You may also add a stiff base for extra structure.
How can I ensure a neat and professional final product?
To ensure a neat and professional final product, it’s important to follow a checklist that includes accurate cutting, consistent seam allowances, reinforcing stress points, adding interfacing, and finishing touches such as edgestitching and topstitching.


