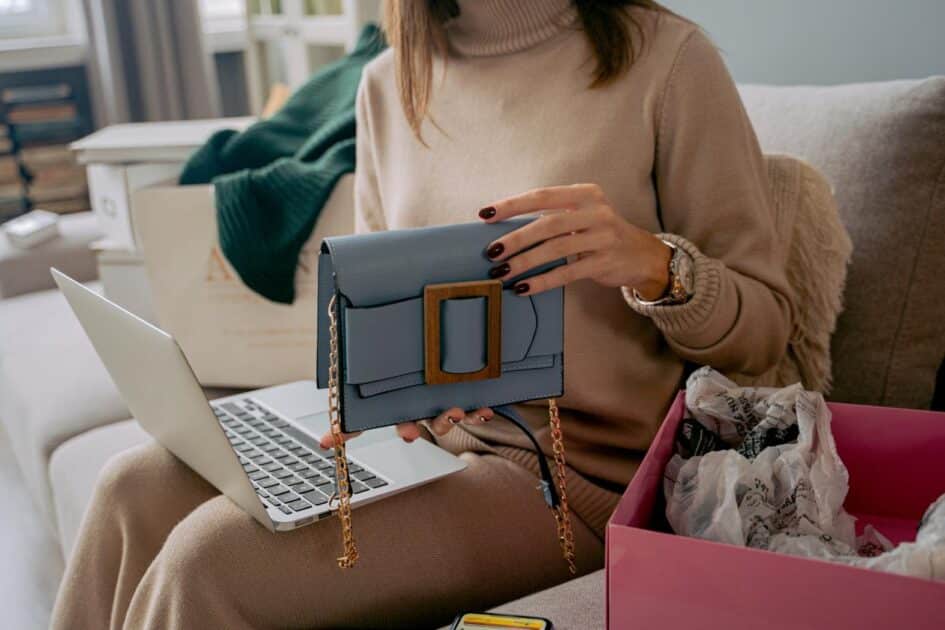
Ever looked at your favorite purse and wished it could be more versatile? You’re not alone! Turning a purse into a crossbody bag isn’t just a fashion statement—it’s a practical move for hands-free convenience.
Why Convert Your Purse into a Crossbody Bag
You’ve seen crossbody bags everywhere, from city streets to runway shows, and for good reason. There’s a growing demand for hands-free options in today’s busy world, and fashion is catching up. Crossbody bags offer a mix of style and function that’s hard to beat, but why convert your existing purse?
First off, converting your purse to a crossbody can change up your look. It’s like getting a brand-new accessory without spending extra cash. You add versatility to your wardrobe instantly, and that’s always a win. Plus, crossbody bags are trending, and you’ll look effortlessly chic.
Next, think about comfort and practicality. A crossbody bag distributes weight evenly across your body, easing strain on your shoulders and neck. It’s a game changer for day-long outings— think less pain, more fun.
And then there’s security. A crossbody bag, worn snugly against your body, makes life tough for would-be pickpockets. Your belongings stay safer as you navigate crowded spaces, giving you peace of mind when you’re out and about.
Here’s a quick snapshot:
| Benefit | Description |
|---|---|
| Fresh Look | Rejuvenates your accessory game |
| Added Versatility | Switch styles effortlessly |
| Improved Comfort | Reduces shoulder strain |
| Enhanced Security | Deters theft with snug fit |
You’re investing in a practical upgrade by doing a simple DIY update that takes minutes. It’s a small change with a big return— comfort, style, security, all in one go. Plus, there’s the satisfaction of customizing your own bag to work just for you.
Ready to make the switch? Grab that purse you love, let’s get started on the transformation journey. Don’t worry, it’s easier than it sounds and you’re going to love the results.
Gathering the Supplies
Before diving into your purse transformation, ensure you’ve got all the necessary supplies on hand. To get started, you’ll need a crossbody strap. This can be purchased online or at a local crafts store. Select a strap that complements your purse’s color and material for a cohesive look.


Tools and hardware are next on your list. Gather a pair of pliers, scissors, and a hole punch – these tools will help you attach the strap securely. Depending on your bag’s design, you may also need spring hooks or D-rings to connect the strap. If your purse already has existing rings or loops, make sure your hardware matches these to ensure a proper fit.
Next, consider the length of the strap. Crossbody straps can be adjustable or fixed-length. If you’re tall or prefer your bag to sit at a specific point on your hip, opt for an adjustable strap. Measure the length you need before making a purchase.
Finally, think about comfort. A wider strap will distribute weight more evenly, reducing shoulder strain. If your purse is on the heavier side, look for a padded strap to increase comfort.
Here’s a quick checklist of supplies you’ll need:
- Crossbody strap
- Pliers
- Scissors
- Hole punch
- Spring hooks or D-rings (if applicable)
Having these items ready will streamline the conversion process. With the right supplies in hand, you’re all set to make your purse into a functional and fashionable crossbody bag.
Choosing the Right Strap
When reinventing your purse as a crossbody, the strap is pivotal. The right strap can make or break the conversion, so take time to select wisely.
Firstly, consider the strap width. A wide strap distributes weight better and adds comfort, especially if you’re planning to carry heavier items. In contrast, a narrow strap gives a more delicate and less casual look.
Next, contemplate the material. Leather straps offer durability and style but can be heavy. Nylon or canvas straps are lightweight and often more affordable, making them great for casual, everyday bags.
You’ll want to match the strap’s color and texture with your purse for a seamless look. Think coordination, not a perfect match. Sometimes, a contrasting strap can add an interesting pop.
The hardware on the strap is another crucial element. Ensure that the clasps and hooks can securely attach to your purse’s hardware loops. Quality metal hardware is preferred—it’s typically more robust and lasts longer.


« DIY Handbag Strap: Transform Your Bag with a Custom Look
What Are Handbags? Discover Styles, Care Tips & Their Fashion Impact »
Here’s a quick checklist of strap qualities to consider:
- Width: Wide for comfort, narrow for style
- Material: Leather for durability, nylon/canvas for lightness
- Color: Coordinating or contrasting for effect
- Hardware: Quality metal for longevity
Adjustability is a feature you shouldn’t overlook. Being able to adjust the strap length will provide versatility and comfort, catering to different heights and styling preferences.
With these considerations, head to your local craft store or online marketplace. You’re one step closer to adding that personal touch to your purse turning it into a stylish, crossbody marvel. Ready to sling it over your shoulder? Ensure the strap feels right—your comfort and the bag’s functionality hinge on this simple yet essential accessory.
Detaching the Handles
Before you attach your new crossbody strap, you’ll need to remove the existing purse handles. Carefully assess how the handles are attached to your purse. Are they sewn, riveted, or clipped on with hardware? Knowing this will dictate the tools you’ll need and the approach you’ll take.
If the handles are clipped on, it’s a simple task. Just open the clips or carabiners and slide the handles out. Make sure to store them safely in case you want to revert your purse back to its original state.
For sewn-on handles, you’ll need a seam ripper or scissors. Take your time and gently cut the threads to avoid damaging your purse. Prepare to reinforce the area later if needed to prevent fraying or tearing.
Handles attached with rivets are a bit trickier. You’ll need a set of pliers to remove them. Grip the rivet firmly and twist to loosen. If the rivets are particularly stubborn, try using a rivet cutter. Be cautious as this method carries the highest risk of damaging your purse.
In any case, once the handles are off, inspect the attachment points. If there are any rough edges or leftover hardware, smooth them out or remove them. You don’t want these to interfere with your new strap or damage your clothing.
With the handles detached, you’re a step closer to transforming your purse into a trendy crossbody bag. Next, you’ll prepare the bag for the new strap. It’s important to ensure that the areas where the new strap will attach are strong and secure. This may involve reinforcing the zones or adding new hardware based on the style and weight of your purse.
Let’s make sure your bag is ready for its stylish upgrade.
Attaching the Strap
Once your bag’s prepped and ready, it’s time to get down to business. You’ve got the perfect strap; now, let’s attach it. Start by locating the anchor points on your purse. These could be existing rings or loops that were once home to the old handles. If none exist, you’re going to create them.
Creating Anchor Points
No anchor points? No problem. Here’s what you’ll do:
- Mark the spots on your purse where you’d like to attach the crossbody strap.
- Use a hole punch to make the holes at these marks. Make sure they’re large enough for your strap’s clips or hardware.
- If your bag’s material is prone to fraying, reinforce the holes. Use clear nail polish or a small piece of fabric adhesive to do this.
Securing the Strap
Attaching the strap is straightforward. If the strap has clips, simply snap them onto the anchor points. For a sewn-on style, you’ll need a needle and thread. Make sure to sew in a durable pattern like a box with an ‘X’ in the middle, to handle daily wear and tear.
Adjusting for Comfort
Adjustability matters. Here’s how to ensure a good fit:
- If the strap’s too long, adjust it to your liking. Some straps come with a buckle or slider, making this easy.
- For non-adjustable straps, you may need to tie a knot or add a new hole with the punch.
- Try on your bag and adjust until it feels comfortable and sits at the right spot on your body.
With these steps, your purse is now a crossbody bag, functional and more versatile than ever. Treat it like a new addition to your wardrobe and enjoy your handiwork.
Adjusting the Length
Once you’ve got your new strap, adjusting its length is crucial for both style and comfort. Ideally, your crossbody bag should sit just above your hip. This placement allows for easy access and maintains a sleek look.
To adjust the strap length, most crossbody straps come with a buckle or slide adjuster. Find this feature and gently pull or loosen the strap through the adjuster. If your strap doesn’t have this, you might need to punch new holes to shorten it. Here’s how:
- Lay the strap out straight.
- Measure the desired length.
- Use a hole punch to create new holes at appropriate intervals.
Be sure to try on the bag periodically as you adjust. This helps you to find the perfect length without too much trial and error. Remember, your crossbody bag’s position can affect your posture and the way you carry yourself. Aim for a length that feels natural and doesn’t pull on your neck or shoulders.
If your strap is too long and can’t be adjusted enough, consider cutting it to size. But before you make any cuts, measure twice—you can’t undo this change. If you’re not confident, a local shoe repair shop can often make professional alterations for you.
What if your strap is too short? In some cases, you can buy an extender or a longer replacement strap. Extenders are simple to attach and can seamlessly give you the added length you need.
Throughout your adjustment process, keep in mind the bag’s balance and aesthetics. Your goal is to create a bag that not only looks great but also feels good to wear. Making these adjustments properly can ensure your newly converted crossbody bag suits your daily needs and maintains its functionality.
Finishing Touches
After securing your strap and adjusting it to the perfect length, it’s time to focus on the finishing touches that’ll transform your purse into a stunning crossbody bag. Remember, the devil’s in the details.
First, inspect the stitching. If you’ve sewn on the strap, ensure every stitch is tight and even. Loose threads can unravel and ruin the look and function of your bag. Trim any excess threads with scissors.
Next, examine the hardware. If there’s any leftover hardware from the original handles, consider removing it to keep your bag looking sleek. If it’s non-removable, see if it blends with the new design. Sometimes, leaving the original rings or clasps can add a touch of character to your bag.
Consider adding decorative elements. A tassel or a charm can personalize your crossbody bag. Make sure these extras don’t compromise the bag’s integrity or your comfort.
Check the bag’s weight distribution. Load your bag and sling it across your shoulder. Ensure it sits right and feels balanced. An uneven bag can lead to discomfort or strain.
Lastly, give your newly converted crossbody bag a good once-over. Look for any areas that might need reinforcement, especially if you plan to carry heavier items. It’s better to address any structural concerns now than deal with repairs later.
Keep these tips in mind, and your crossbody bag will not only turn heads but also stand the test of time. Whether you’re stepping out for a coffee or heading to a meeting, you’ll have a one-of-a-kind accessory that’s both stylish and practical.
Conclusion
You’ve now transformed your purse into a chic crossbody bag that’s not only stylish but comfortable to wear. Remember to keep an eye on the weight distribution to ensure it feels balanced on your shoulder. Don’t forget to give your bag a final once-over to make sure everything’s secure and ready to go. With these tweaks, you’ve breathed new life into an old favorite, creating a custom accessory that’s uniquely yours. Enjoy flaunting your handiwork and the convenience of your new crossbody bag!
Frequently Asked Questions
What materials do I need to convert a purse into a crossbody bag?
You will need a crossbody strap, pliers, scissors, and a hole punch to convert your purse into a crossbody bag. Make sure to have a strap that is comfortable, adjustable, and matches your bag in terms of width, material, and color.
How do I choose the right crossbody strap for my purse?
Select a strap that matches the style and color of your purse and ensure it’s adjustable. Consider the width, material, adjustability, and the hardware of the strap for the best fit and comfort.
Can I remove handles that are sewn on or attached with rivets?
Yes, handles that are sewn on can be carefully removed with scissors, while those attached with rivets might require pliers. Always inspect and smooth out the attachment points after removal.
How do I attach a new strap to my purse?
You can either snap on clips or sew the strap on, depending on the design of the crossbody strap and your purse. Ensure the attachment points on the bag are secure before attaching the strap.
What’s the importance of strap adjustability?
Adjustable straps allow you to find the perfect length for style and comfort. You can use a buckle, slide adjuster, or punch new holes to make adjustments. Consider professional alterations if needed.
What finishing touches should I add after converting my purse?
Inspect stitching, trim loose threads, examine hardware, and consider removing any irrelevant original hardware. Optionally, add decorative elements but avoid compromising the integrity or comfort of the bag.
How do I ensure my crossbody bag is comfortable to wear?
Check the bag’s weight distribution to ensure it is balanced and feels good to wear. Make any necessary structural adjustments to avoid discomfort.