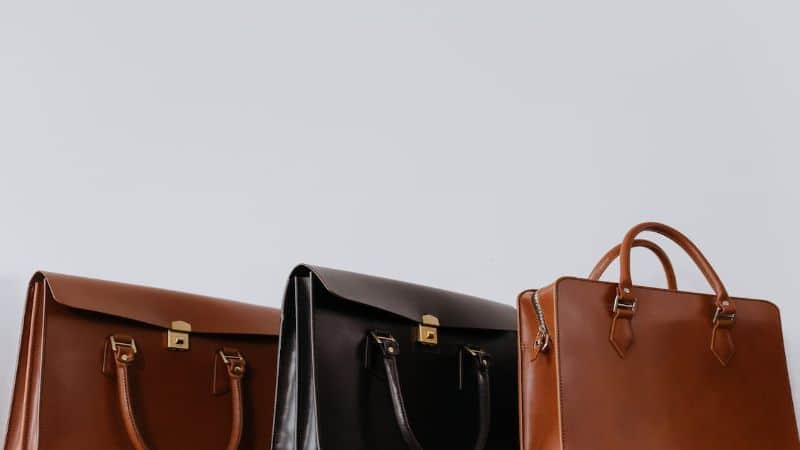
Ever found yourself wincing at the sight of your favorite purse’s frayed handles? You’re not alone. Worn purse handles can make even the chicest bags look tired and unloved. But before you consider parting ways with your beloved accessory, know that there’s a fix!

Assess the damage
Before diving into repairs, evaluate the extent of wear on your purse handles. Is the damage superficial or is it structural? Small surface scratches and fading color can often be restored, but tears or severe peeling may require more meticulous repair work.
Check for these signs to gauge the severity:
- Cracking: Minor cracks in the material may just need a touch-up with leather paint or conditioner.
- Stitching: Loose or unraveled stitching is a common sign of wear that’s generally an easy fix with needle and thread.
- Peeling: For faux leather, peeling can indicate a need for a more comprehensive solution, such as a handle wrap or replacement.
- Structural Weakness: If the handle is frail, misshapen, or broken, it might compromise the bag’s integrity and functionality.
Determine the Material: Is your purse made of genuine leather, faux leather, fabric, or another material? Repair techniques will vary, so identifying this is crucial. For example, genuine leather often requires special cleaning and conditioning products tailored to preserve its quality and appearance.
Once you’ve assessed the condition and material of your purse handles, gather the necessary repair materials. A standard repair kit might include:
- Leather conditioner or fabric glue
- Matching thread
- A fine needle
- Leather paint
- Clear nail polish or super glue for minor fixes
Remember to clean the handles before attempting any repair. Dirt and oil can prevent adhesives from sticking or dyes from taking evenly. Use a gentle cleaner designed for the material and allow it to dry completely.
Fixing your beloved purse will save you money and extend its lifespan, making it a smart and sustainable choice. Plus, it’s a chance to add your personal touch, perhaps with a decorative scarf or custom stitching—turning a once-worn item back into a fashion statement.
Determine the material
Identifying the material of your purse handles is crucial. The material dictates which repair methods and products you’ll need for an effective fix. Common materials include leather, faux leather, cloth, and synthetics, each with unique needs when it comes to repair.
So how do you figure out what your purse is made of? If you’ve retained the care label or manufacturer’s tag, that’s your treasure trove of info. No label, no problem. Leather has a distinctive, earthy smell, and its texture varies slightly across its surface. Faux leather, by contrast, is uniform in texture and lacks that characteristic leather scent.


When it comes to cloth handles, the weave should be your focus. Consider the thickness, the pattern, and if there’s any stretch. For synthetics, look for a plastic-like feel and elasticity. You’re likely dealing with materials like nylon or polyester if they’re lightweight and water-resistant.
Now test your findings. Leather absorbs water and darkens briefly; synthetics and faux leather don’t. Perform a small, inconspicuous water-drop test to confirm your observations. Remember, you’re playing detective—observations lead to conclusions on the material front.
Once you’ve nailed down the material, you’ll tailor your repair approach. Leather begs for conditioner and special leather stitching kits. Cloth might need a fabric glue or a patch. Synthetics often respond well to heat-set patches or adhesives.
Gather your materials accordingly. If you’re dealing with real leather, source a quality leather conditioner and leather paint that matches. For faux leather, clear nail polish or a suitable adhesive will do the trick. Cloth handles could benefit from matching thread, whereas synthetics might require a heat-sealing method.
Remember, your purse’s durability and aesthetics are in your hands. Properly determining the material helps ensure a long-lasting repair that can withstand the daily grind.
Gather necessary tools and materials
Before diving into repairing your purse handles, you’ll need to assemble the right toolkit. Having everything on hand streamlines the process and ensures you’re prepared for any hiccups along the way.
First, identify the specific tools for the material you’re working with:
- For leather or faux leather, secure a leather needle, strong thread, and a pair of pliers. Leather adhesive can also be handy.
- In the case of cloth handles, a fabric needle and matching thread are essential, along with fabric glue for extra reinforcement.
- For synthetic materials, gather a heavy-duty needle and thread, and consider a suitable synthetic adhesive.
Next, let’s talk about materials:
- If you’re patching up holes or tears, find a matching piece of material to use as a patch.
- For reinforcement, consider getting a strip of leather or durable fabric that complements your purse for a seamless look.
Once you have all your tools and materials, organize them in your workspace. Doing so not only speeds up the repair process but also prevents the loss of small items like needles and thread.
Finally, don’t forget to have a pair of scissors and some clear tape on hand. Scissors are for trimming any excess material or thread, while tape can help keep patches in place as you sew or glue.


« How Do I Clean My Gucci Handbag? Expert Tips for Luxe Care
Replace Handbag: Discover the Perfect Match with Expert Shopping Tips »
Here’s a quick checklist of supplies to gather before starting:
- Leather needle (for leather or faux)
- Fabric needle (for cloth)
- Heavy-duty needle (for synthetics)
- Strong thread (color-matched)
- Leather adhesive (for leather or faux)
- Fabric glue (for cloth)
- Synthetic adhesive (for synthetics)
- Scissors
- Clear tape
- Pliers
By ensuring you have every tool and material needed, you’re setting yourself up for success and a revitalized purse that’s as functional as it is stylish.
Reinforce the handles with fabric glue
To start repairing purse handles with noticeable wear, fabric glue can be your go-to solution. Fabric glue acts as a reinforcement layer that lends strength to the existing material. Begin by choosing a fabric glue designed for the purse’s material; leather adhesives work differently than those meant for cloth.
Clean the handle thoroughly before applying any glue. Dust and oils from your hands can prevent the glue from adhering correctly. For leather or faux leather, use a damp cloth. For cloth handles, consider a gentle fabric cleaner.
Apply the glue evenly but be conservative. You don’t want excess glue spilling over and ruining the handle’s appearance. When applying glue to the damaged area, use a small brush or the tip of the glue bottle for precision. Ensure the glue gets into any cracks or thinning areas without over-saturating.
After glue application, press the repaired sections together. Use clamps or a simple binder clip to hold these sections in place. Wait for the recommended time on the glue’s instructions—typically several hours for a strong bond. Don’t rush: patience here pays off in long-lasting results.
Lastly, test the bond by carefully handling the purse. You’re checking for the glue’s hold—there should be no slipping or gaps. Remember, fabric glue isn’t a complete fix but it’s an intermediary step to enhance handle durability until a more permanent solution is sought. Advanced measures might include stitching reinforcement for a handle that’s frequently used or carries weight often.
Keep in mind that fabric glue reinforcement is ideal for minor repairs and isn’t meant to recover heavily damaged handles. When the wear is beyond a light touch-up, consider seeking professional repairs or handle replacement.
Sew the handles back together
When your purse handles have splits or tears, sewing can be an effective fix. Choose a thread that closely matches the color and strength of the original handle material to maintain a consistent look.
Start by cleaning the damaged area. Make sure it’s free of debris to ensure the stitches hold. Then, prepare a needle and thread. If you’re dealing with leather or thick fabric, you might need a specialized needle.
Next, align the torn edges of the handle. Keep them as flush as possible for a seamless repair. Begin stitching from one end of the tear, securing the thread with a knot hidden inside the handle if you can.
Use a stitching pattern that reinforces the handle’s strength. A cross-stitch or backstitch technique works well to distribute tension along the seam. Keep your stitches tight and even. Avoid pulling too hard to prevent puckering the material.
Check your work as you go. Make sure the handle’s shape doesn’t twist or warp. After stitching, trim any excess thread. Lightly tug on the handle to test the repair’s integrity.
If you notice fraying edges on the tear, consider sealing them with a small amount of fabric glue before you start sewing. This can prevent further wear and help the stitches hold better.
Remember, the goal is durability and aesthetics. Your repair should restore the handle to its original strength and appearance as much as possible. If the handle continues to show signs of weakness after your repair, reinforcing it or replacing it may be necessary. Keep an eye on how it holds up to daily use.
Occasionally, even with careful stitching, handles can remain delicate. Monitor the repair for signs of strain. If the fix doesn’t hold, seek a professional’s help or consider investing in a new handle to ensure longevity and style.
Alternatively, replace the handles
Sometimes repair just won’t do. When you’ve stitched and glued but still don’t trust the integrity of your purse handles, it might be time to consider replacement. Opting for new handles can give your purse a fresh look and extended life.
Start by measuring your current handles. Take note of the length and width. This ensures a proper fit. You wouldn’t want to end up with handles that are too short to sling over your shoulder or too narrow to feel comfortable in your hand.
Next, choose materials that match or complement your purse. Leather offers durability and a classic look. Fabric handles add a pop of color and are also lighter. Chains contribute a chic edge and can really transform the style of your purse. Create a mix-and-match style for a unique accessory.
Here’s how you can proceed:
- Remove the old handles cautiously, avoiding damage to the purse itself.
- Line up the new handles with the existing attachments.
- Use a suitable adhesive or strong thread to secure fabric or leather handles in place.
- If opting for chain handles, use pliers to open and close the links when attaching them to your purse.
Tips for Success:
- Keep the original look by choosing handles that resemble the old ones.
- Dare to innovate if you desire a completely new style.
- Ensure that the attachment points are sturdy.
If you’re not confident doing this yourself, a professional can help. Swing by your local shoe repair or leather goods store. They’re usually equipped to handle such adjustments.
Remember to test the new handles thoroughly before heading out. You’d hate for your beautifully revamped purse to malfunction in the middle of your day. By methodically choosing and carefully attaching new handles, you rejuvenate your beloved accessory.
Conclusion
Now that you’ve tackled the challenge of repairing or replacing your purse handles you’re all set to step out with confidence. Remember to give those new handles a good test run around your home before you take your refreshed accessory out on the town. Whether you’ve kept the original charm or added a twist of your own style, you’ve breathed new life into a beloved piece. Don’t hesitate to show it off and feel proud of your handiwork. After all, it’s not just a purse—it’s a statement of your creativity and skill!
Frequently Asked Questions
What is the first step in repairing worn purse handles?
To repair worn purse handles, the first step is to evaluate the extent of the damage carefully.
How can I determine the material of my purse?
Examine the texture and appearance of your purse, and if needed, check the manufacturer’s tag or documentation for material details.
Is it possible to repair all types of purse handle damage?
Small issues like fraying or loose stitching may be repairable, but significant damage might require handle replacement.
How do I measure for new purse handles?
Measure the length and width of the current handles, noting the attachment points, to choose new handles that fit.
Can I replace purse handles with a different material?
Yes, you can choose different materials for new handles to give your purse a fresh look or maintain its original style.
What’s important when attaching new handles to a purse?
Ensure that the attachment points are sturdy, and the new handles are securely fastened to the purse.
Should I attempt to repair the purse handles myself?
If you’re comfortable with DIY crafts and minor repairs, you may attempt it, but for complex damages, seek professional help.
How should I test the new purse handles after repair?
Gently pull on the handles to ensure they’re secure, and test by carrying the purse with some weight in it.