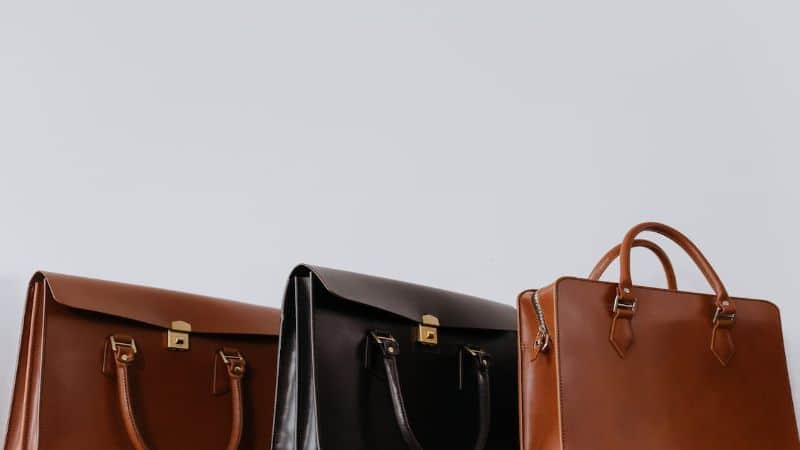
You’ve got that favorite handbag sitting in your closet, looking a bit worn and not quite as fabulous as it used to. It’s the one that’s been with you through thick and thin, and you’re just not ready to part with it. Well, you’re in luck because breathing new life into your beloved accessory might be easier than you think.
From scuffs and tears to loose stitching and broken zippers, a few repair tricks can extend the life of your handbag. Whether you’re a DIY enthusiast ready to tackle the challenge or you’re considering professional help, we’ve got some tips to help you get started.
Assessing the Damage
Before diving into repairs, take a closer look at your handbag. Lay it out on a clean surface with good lighting and examine each part with care.
Start by checking the exterior leather or fabric. Look for scuffs, discoloration, and tears. Make a list; categorizing issues allows you to tackle them methodically. Move on to inspect the corners and bottom, places that often bear the brunt of daily use.
Inspect the handles and straps next. Are they frayed or detached? This type of damage can compromise the bag’s functionality. Often, handles need reinforcement or complete replacement.
Peer inside the handbag. Examine the lining for any rips, stains, or seams that have come undone. These can be subtle problems that grow worse over time. A damaged lining can leak small items or fray further, complicating repairs later.
Next, test all zippers and closures. These elements are crucial for securing your belongings. If zippers are sticking or clasps are loose, add them to your repair list. Keep an eye out for missing zipper teeth or damaged slider mechanisms.
Check hardware like buckles, rings, studs, and snaps. Loose or tarnished hardware not only affects the bag’s aesthetics but also its integrity.
Assessing the damage thoroughly gives you a clear roadmap for refurbishment. It’ll also help determine if professional services are required or if you can manage the repairs yourself. Start with the simplest fixes and progress to the more complex ones. Prioritize repairs based on necessity and difficulty, but remember to approach this process with patience; repairing a beloved handbag can be as rewarding as it is challenging.


DIY Repairs
Once you’ve assessed your handbag’s damage, it’s time to roll up your sleeves and get to work. If you’re dealing with surface scuffs or minor discolorations, leather cream and a soft cloth can do wonders. Remember, it’s vital to test any product in an inconspicuous area first to ensure you don’t inadvertently discolor the entire bag.
For tougher tasks, like reattaching handles or straps, you’ll need a strong adhesive that’s designed for leather or the specific material of your bag. Seek out specialized glues that can provide a firm hold without damaging the material.
- Minor tears can often be repaired with a leather repair kit, enabling you to patch up any small area with precision.
- If your bag has loose threads, trim them carefully with scissors and use a small amount of fabric glue to prevent further unravelling.
- For a stuck zipper, apply a lubricant like candle wax or soap to ease its movement without leaving stains.
When it comes to hardware, such as buckles or clasps, you might find replacements at craft stores. Ensure you match the size and color to maintain your handbag’s original look.
Should the lining have tears, you can hand stitch them if they’re small, or consider sewing in a new lining if the damage is extensive. Pick a fabric that complements the bag’s exterior and adds a personal touch.
Remember, patience is key. Success with DIY repairs requires a steady hand and attention to detail. Taking your time can yield results that are both rewarding and cost-effective.
Tools and Materials
Before diving into handbag repairs, you’ll need to gather the right tools and materials.
Leather Cream and Conditioner
You can’t skimp on quality here. A top-notch leather cream rejuvenates the material, adding suppleness and preventing further damage.
Specialized Glues
For handles and straps, a strong, fabric-friendly adhesive is crucial. Check the label to ensure it’s suitable for leather or your specific handbag material.
Leather Repair Kits
These are lifesavers for minor tears or scratches. They usually include patches, dyes, and a sealing compound.
Fabric Glue
For the bag’s lining, a gentle but durable fabric glue is your best bet.


« How to Clean Orla Kiely Handbags: Tips to Preserve Their Charm
Why Handbags Are So Expensive: The Hidden World of Luxury Prices »
Fine Point Scissors and Tweezers
Ideal for trimming loose threads and handling small components.
Replacement Parts
Always have extra zippers and hardware on hand. Matching them to your handbag keeps the original look intact.
Stitching Awl and Needles
For sewing and precision repairs, these tools are indispensable.
Lubricant
Dry, non-oil-based lubricant will unstick zippers without damaging the bag’s fabric.
Here’s a quick rundown of essentials:
| Item | Purpose |
|---|---|
| Leather Cream | To nourish and protect the leather |
| Specialized Glues | For reattaching parts |
| Leather Repair Kits | For patching up small tears |
| Fabric Glue | For fixing the lining |
| Scissors and Tweezers | For trimming and adjusting parts |
| Replacement Zippers | For when originals fail |
| Stitching Awl & Needles | For sewing repairs |
| Lubricant | For smoothing zippers |
Stock up accordingly, and make sure you’re working on a clean, flat surface. Protection for your work area is just as important; you don’t want to accidentally damage the surface below. A large, flat piece of cardboard or a craft mat can provide a good protective layer.
Remember, the right tool for the right job not only ensures a smoother repair process but also a more professional-looking result. Keep everything organized and within reach as you work to avoid misplacing these crucial items.
Repairing Scuffs and Scratches
When your beloved handbag starts to show signs of wear and tear, scuffs and scratches can mar its elegant appearance. But don’t fret; you can often handle these blemishes yourself. First things first, you’ll need to closely inspect the damaged area. Light scuffs typically only affect the surface, while deeper scratches may have penetrated the leather’s finish.
Before you start the repair process, make sure your handbag is clean and dry. Any dirt or moisture can interfere with the repair materials, reducing their effectiveness. For light scuffs, leather cream is your go-to. Choose a color-matched cream; this not only improves the appearance but also conditions the leather, keeping it supple.
Apply a small amount of cream using a soft cloth in gentle, circular motions. The motion helps to work the cream into the leather and buff out the scuff. You should notice the scuff disappearing as you blend the cream into the surrounding area. If the scratch is deeper, a leather repair kit may be needed. These kits come with colored compounds designed to fill in scratches.
Here’s a quick how-to when using a leather repair kit:
- Select the color compound that closely matches your bag.
- Apply the compound to the scratch using the tools provided in the kit.
- Follow the kit instructions for drying times and subsequent actions, such as applying a leather finish.
Remember, patience and precision are key. Rushing through the repair can make the damaged area more noticeable rather than less. Using the right tools and techniques, those unsightly scuffs and scratches won’t stand a chance. Your handbag will be back to looking chic and sophisticated in no time, ready to accompany you wherever you’re headed next. Keep your leather repair kit and leather cream handy for future touch-ups, ensuring your handbag stays pristine for as long as possible.
Fixing Tears and Holes
When your favorite handbag starts showing signs of wear with tears and holes, don’t fret—you’ve got options. Leather repair kits are your go-to for mending these damages. They typically include compounds and tools specifically designed to work with the handbag’s material, ensuring a seamless mend.
Start by cleaning the affected area; any dirt or grime can impede the repair process. If there’s a hole, you’ll need a subpatch—a piece of material that goes behind the tear. This acts as a base for the repair compounds to adhere to and provides structural support. Before applying the subpatch, trim any frayed edges with your scissors.
Once the prep work is done, apply the repair compound from the kit to fill the tear or hole. Aim for a thin layer that just covers the damage—too much material can make the area look bulky and feel stiff. Use the tools in the kit to smooth it out for an even surface. Match the color of your bag as closely as possible. If the kit includes paint or dye, apply it after the compound cures for a uniform appearance.
For fabric linings with tears, lightweight fusible interfacing might be your solution. Place it behind the tear, and lightly iron it to bond the materials together. Some situations might call for hand-stitching with a needle and thread. Opt for a color that matches the lining, and work in small, even stitches to maintain the bag’s aesthetic integrity.
Always allow ample time for repairs to set and dry. This can range from a few hours to overnight, depending on the products used. During this time, keep the handbag in a shape that prevents further stress on the repair site.
Remember, a well-executed repair can vastly extend the life of your handbag, so treat each tear as an opportunity to show off your DIY prowess. With patience and the right materials, even the most visible damages can be turned virtually invisible.
Reinforcing Stitching
When your handbag’s threads start to give way, it’s crucial to reinforce the stitching before a small issue becomes a major tear. Begin by examining the stitches. Look for signs of wear such as loose or frayed threads.
If you’ve spotted weak areas, don’t fret. Reinforcing stitching is simpler than you might think. Start by selecting the right color thread – it should match the existing stitching perfectly to maintain the original look.
Next, you’ll need a stitching awl and strong nylon or polyester thread. Leather bags often require heavier thread and a specific needle. Remember, matching the thickness of the original thread helps maintain the bag’s integrity.
Here’s how to proceed:
- Thread the needle with a length of thread around 18 inches long to manage easily.
- Double up the thread for extra strength and make a knot at the end.
- Stitch parallel to the existing line, following the original holes.
Keep your stitches tight and consistent. Slip the needle through the existing holes to avoid additional punctures in the leather. If the original holes have widened, stitching through them can actually reinforce the material’s edge.
Be patient and careful not to pull too strongly, causing puckering. Puckering can misshape the bag and lead to further damage.
For the interior lining, use a finer needle and thread. The approach is mostly the same, but you’ll likely stitch right through the lining rather than existing holes.
Lastly, if you’re unsure or the damage looks extensive, contact a professional. They have the tools and expertise to handle delicate repairs without risking further damage. Remember, a well-maintained handbag can last a lifetime with the right care and timely repairs.
Replacing Zippers and Hardware
When your handbag’s zippers or hardware like snaps, buckles, and metallic embellishments start to fail, it’s time for a quick refresh. Replacing faulty zippers is crucial to functionality, as they secure the contents of your bag.
Firstly, identify the type of zipper that needs replacing. There are coil zippers, metal zippers, and plastic-molded zippers. Purchase the exact match for an ideal fit. Remove the old zipper with a seam ripper, taking care not to damage the fabric. Pin the new zipper in place and use a zipper foot attachment to sew it on.
If your zipper’s just stuck, a dab of lubricant on the teeth might do the trick.
For snap and buckle replacement, start by removing the broken hardware. Tweezers or pliers are usually the best tools for this job. Check the size and style of the hardware against your handbag to ensure a consistent look.
Here’s a list of materials you’ll need for replacing hardware:
- Replacement zipper or hardware
- Seam ripper
- Sewing machine with a zipper foot
- Screwdriver (for certain types of hardware)
- Pliers or tweezers
Always choose quality replacement parts; they last longer and maintain the bag’s value. When attaching new hardware, use the existing holes as a guide for precision. If screws are involved, make certain they’re tight, but be careful not to strip them.
Remember, you’re aiming to repair and preserve, so take your time. If you’re feeling uncertain, consult a professional. They can ensure that the replacement is seamless and in line with the bag’s original design.
Seeking Professional Help
Sometimes a handbag’s damage is beyond DIY repairs. When you encounter a problem that’s too complex, it might be time to seek professional help. Professionals have the skills and tools to tackle difficult tasks without causing further harm to your beloved accessory.
Identify a reputable repair service by looking for reviews and recommendations. Use social media or fashion forums to ask for suggestions. Once you’ve found a service, ask about their experience with your handbag’s brand and material.
Inquire about the repair process. A professional should offer a clear explanation of what needs to be done, the timeframe, and the cost. Ensure they give a detailed account of the repair steps to avoid any surprises.
If you’re dealing with a luxury handbag, check if the brand offers repair services. Many high-end brands provide in-house repair or refurbishment services, which is often the safest bet. This ensures that your handbag is handled with the appropriate techniques and materials.
Cost is a crucial factor. Get a quote before committing. Sometimes the repair could be more expensive than the handbag’s current value. In such cases, weigh the sentimental value against the repair cost.
Don’t hesitate to compare different services. Check turnaround times, cost, and warranty on the repair work. High-quality repairs can breathe new life into your handbag, but they should be cost-effective.
Remember, professional repairs are an investment in extending your handbag’s lifespan. With the right service, your handbag can return to its former glory and continue to be a staple in your wardrobe for years to come.
Conclusion
You’ve got all the insights to tackle handbag repairs, whether it’s a minor scuff or a major tear. Remember, the key to a long-lasting fix is patience and precision. Don’t be afraid to reach out for professional help when a project feels beyond your DIY skills. With the right approach, your beloved accessory will stay by your side for years to come, ready for all the adventures ahead. Here’s to giving your handbag a new lease on life and enjoying every step of the journey with it!
Frequently Asked Questions
How do I assess the damage on my worn handbag?
Examine the bag’s exterior, corners, bottom, handles, straps, lining, zippers, closures, and hardware carefully for scuffs, tears, detachment, frays, rips, and stains. List the issues and prioritize repairs.
Can I repair my handbag myself or do I need a professional?
It depends on the extent of the damage. Minor issues like surface scuffs or loose threads can often be fixed DIY with tools like leather cream or fabric glue. More significant damage may require professional services.
What tools and materials are essential for DIY handbag repairs?
Stock up on leather cream, specialized glues, leather repair kits, fabric glue, scissors, tweezers, replacement parts, a stitching awl, needles, and lubricant. Work on a clean, flat surface for best results.
How can I fix scuffs or scratches on my handbag?
For light scuffs, use leather cream and a soft cloth. Deeper scratches may need a leather repair kit. Be patient and precise, and allow repairs to fully dry.
What should I do about tears or holes in my handbag?
Clean the area and use a leather repair kit with a subpatch for support. Apply a repair compound evenly. For fabric linings, use fusible interfacing, and if necessary, hand-stitch with a needle and thread.
How can I reinforce the stitching on my handbag?
Choose the right color thread and use a stitching awl with strong nylon or polyester thread to carefully reinforce stitching. If uncertain, consider professional help.
How do I replace zippers and hardware on my handbag?
Identify the exact type of zipper and find a matching replacement. Follow step-by-step instructions for replacement and use lubricant for stuck zippers. Remove broken hardware with tools and attach quality replacements.
When should I seek professional help for handbag repairs?
Seek professional help if the damage is extensive or if you’re unsure of the repair process. Check for reputable repair services with experience on your handbag’s brand and inquire about their process, cost, and warranty.