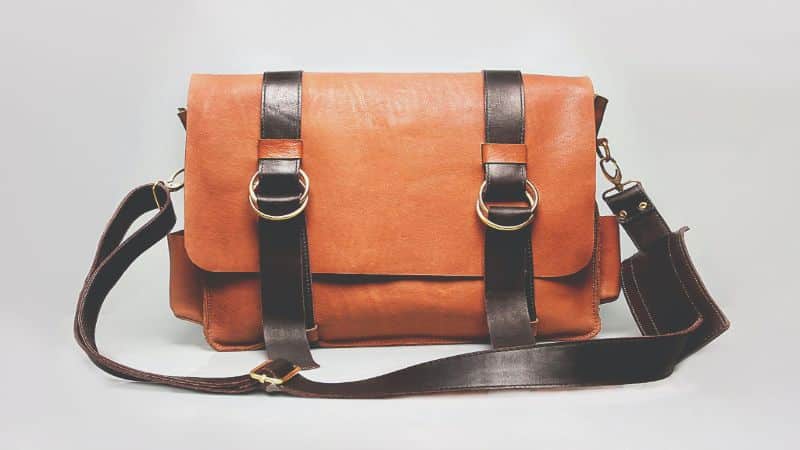
Ever looked at a handbag and thought, “Wow, that metal detail could use a pop of color”? Well, you’re not alone. Customizing your accessories is a fun way to express your style, and painting the metal on your handbag is a great place to start.
Factors to consider before painting metal on a handbag
Before you start the transformation of your handbag with a fresh coat of paint on its metal components, there are several factors crucial for the success and durability of your project. From the type of handbag to the quality of materials, pay attention to the details to ensure a result you’ll be proud to showcase.
Type of Metal
Different metals react differently to paint. It’s essential to know whether you’re working with brass, nickel, or another metal. Your choice of paint and primer will depend on this.
Quality of Paint and Primer
Not all paints and primers are created equal. Opt for products specifically designed for metal, which will adhere better and resist chipping over time. Always check the compatibility of the paint with the metal you’re working on.
Durability and Usage
Consider how often you use the handbag. High-use bags will require a more durable paint to withstand regular handling. Think about the longevity of the finish you desire.
Color Choice
Be bold or subtle—your color choice should reflect your personality. However, remember that certain colors may show wear and blemishes more easily.
Preparation and Safety
Preparing the metal by cleaning it thoroughly and lightly sanding is key to good paint adhesion. Safety is also paramount; ensure you work in a well-ventilated area and use protective gear like gloves and a mask if needed.
Test First
If possible, do a patch test on an inconspicuous area or a similar piece of metal to see how the paint adheres and looks once it dries. This will save you from potential disappointment.
Considering these factors will help maintain the integrity of your handbag while allowing you to express your unique style. Is it a lot to consider? Sure, but the final result can be well worth the effort. After all, a tailor-made handbag can make a statement like nothing else.


Choosing the right type of paint for metal
When you’re about to paint metal details on a handbag, picking the right paint is crucial. Not all paints are equal, especially when it comes to sticking to metal surfaces and withstanding the wear and tear they’ll encounter. Your options typically include acrylic, enamel, and epoxy paints. Here’s what you need to know about each.
Acrylic Paints: These are water-based and offer easy clean-up with soap and water. They’re less toxic than others, making them a safer choice for indoor projects. However, for longevity and to prevent chips, you’ll need a good quality sealer.
- Fast-drying
- Easy to work with
- Wide range of colors
Enamel Paints: Known for their durability, enamels are oil-based and provide a hard, glossy finish that’s perfect for metal surfaces.
- Great for high-use accessories
- Resistant to damage
- Creates a polished look
Epoxy Paints: Combining epoxy resin and hardener, these paints form a barrier that’s impervious to almost everything once it cures. Epoxy is often used for industrial purposes, which means it’s overkill for most fashion accessories.
- Extremely durable
- Best for heavy wear and tear
- Complex application process
Remember, the type of paint you choose will affect not only the look but also the functionality of the handbag post-painting. Match the paint type to your intended use of the bag—if it’s a showpiece, acrylic might suffice but for a daily-use bag, enamel could be your best bet.
Consider the finish you want as well. Matte, satin, and glossy options exist within acrylic and enamel paints. Visualize the final product before making your selection. Once you have your paint’s type and finish figured out, don’t forget to invest in quality brushes or sponges. The application tools play a huge part in achieving a smooth, professional look.
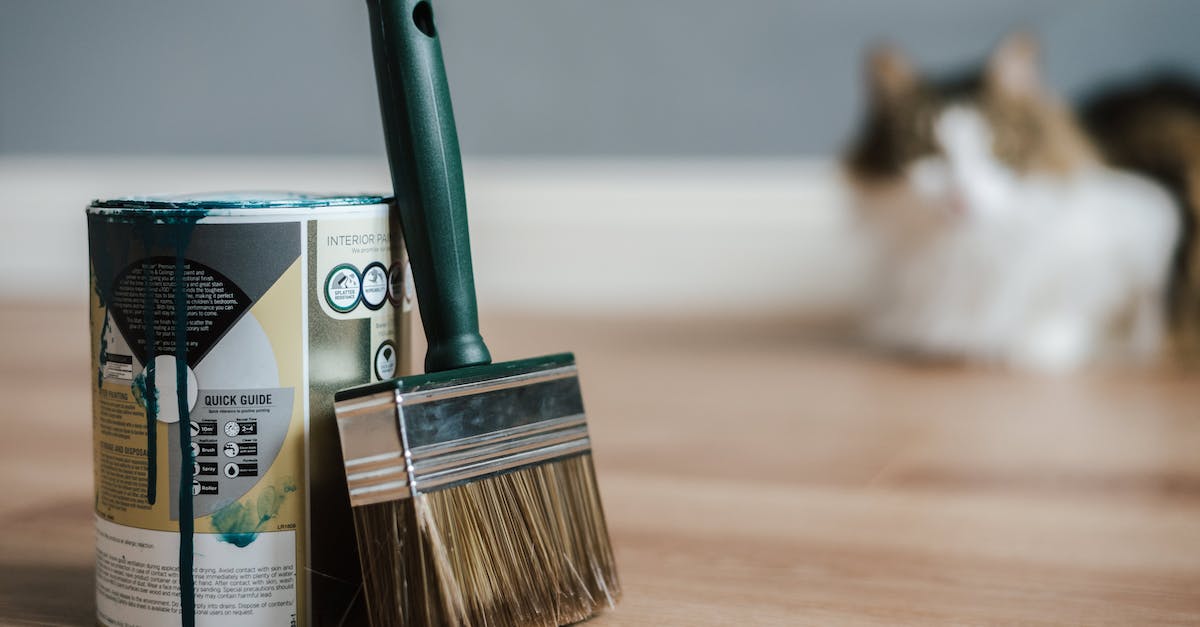
Preparing the handbag for painting
Before you start painting the metal on your handbag, ensure it’s clean and ready for a makeover. Dirt, oils, and existing finishes can affect paint adhesion, so tackling this step is crucial for long-lasting results.
Start by gently wiping the metal with a soft cloth to remove any surface dust. For a deeper clean, use a mixture of warm water and mild soap. Be careful not to soak the metal; a damp cloth will do the trick. Avoid harsh chemicals or abrasive materials that can damage the metal’s surface.
Next, lightly sand the metal hardware with fine-grit sandpaper. This will create a subtle texture for the paint to grip onto. It’s not about removing the existing finish but about giving the new paint a better surface to adhere to.
Once sanded, wipe down the hardware again with a clean, dry cloth to remove any dust from sanding. Make sure the metal is completely dry before moving on to the primer.


« Can You Take a Handbag and Hand Luggage? Maximize Your Carry-On
Handbag vs Tote: Discover the Best Bag for Your Lifestyle »
Applying a quality metal primer is essential for paint performance and durability. It will not only promote adhesion but will also help prevent future rust and corrosion. Apply the primer with a fine brush, ensuring a thin, even coat. Follow the manufacturer’s instructions regarding drying time.
Masking tape is your best friend to protect the handbag’s fabric from unintended brush strokes. Carefully tape around the metal hardware, ensuring that only the parts you wish to paint are exposed. Take your time with this step; precision here can mean the difference between a professional-looking finish and a DIY disaster.
Choosing the Right Primer and Tape
Select a primer intended for use on metal surfaces. Look for one that is fast-drying and formulated to work with the type of paint you’ve chosen. As for masking tape, opt for a version that is easy to remove, such as painter’s tape, to minimize the risk of damage to the handbag material.
- Metal primer: Fast-drying, compatible with paint type
- Masking tape: Gentle on fabrics, easy removal
Remember, the effort you put into preparing your handbag for painting will directly reflect in the quality of the finished product. Taking your time during this preparatory phase sets the stage for a stunning handbag transformation.
Applying primer to the metal
Once your handbag’s metal details are clean and ready, it’s time to move on to priming. Primer is crucial; it ensures paint adherence and longevity. Go for a metal primer to match your paint type—oil-based with oil-based, water-based with water-based.
Before starting, make sure you’re in a well-ventilated area. Safety first! Wear gloves to avoid getting primer on your skin. Shake the primer well to mix it properly. Now, start applying a thin, even coat. Here’s how:
- Use a small brush for precision.
- Apply the primer to all metal areas.
- Avoid primer pooling in crevices.
Wait for the first coat to dry completely. This might take a few hours, but patience pays off. Once the first coat is dry, assess the coverage. If you spot thin areas, apply a second coat. Remember, thin coats are better than one thick layer.
Dry time is essential. Rushing leads to issues. After the final coat, give the primer ample time to set. This will create a solid base for your paint. Following the drying, it’s time to transition to painting, which brings your handbag customization to life.
When handling the paint, keep the same cautious approach as with the primer. Consistent strokes and patience will yield the best results. After priming, you’re halfway to a beautifully customized accessory. It’s all about careful preparation and execution. With the right approach, your handbag will have a professional-looking finish that stands the test of time.
Painting the metal on the handbag
Following primer application, you’re now ready to paint. Ensure the primer is completely dry before you begin. Skipping this step can cause the paint to peel or chip later. It’s time to pick the right paint. You’ll need metal paint, preferably one that’s specially formulated for the type of metal your handbag hardware is made of.
Selecting the Right Paint
When choosing paint, consider durability and finish. Oil-based paints are praised for their durability, while acrylic paints offer a wider range of colors. Here are options to consider:
- Enamel paint for toughness
- Spray paint for a smooth, even coat
- Acrylic paint for easy clean-up and vibrant color
Applying the Paint
Start painting with thin layers. This technique prevents drips and ensures a smooth coat. If you’re using spray paint, keep the can about 6 to 8 inches away from the surface. Apply in a steady back-and-forth motion. For brush-on paints, use a small, fine brush to get into all the nooks and crannies.
Drying and Re-Coating
Between coats, give enough time for the paint to fully dry. This could take several hours, so patience is key. After the first coat has dried, assess whether you need a second coat. If so, lightly sand the first layer before applying the next. This will provide a better surface for the paint to adhere to.
Remember to always work in a well-ventilated area and wear protective gear. Keep checking the manufacturer’s recommendations on drying times and re-coating intervals. Adhering to these instructions is crucial for a lasting finish.
Adding finishing touches
After your paint layers have thoroughly dried, it’s tempting to call it done, but don’t overlook the finishing touches. Now’s the time to add a protective clear coat that’ll ensure your handbag’s metal accents stand up to daily wear and tear. You’ve got some options here:
- Clear enamel spray: Ideal for a durable, glossy finish.
- Polyurethane: For a more natural look that’s still protective.
Before you apply, make sure the painted surface is clean and free from any dust. Lay down a final coat of your chosen protector with the same attention to detail as the paint. If you’re spraying, hold the can about eight inches away from the surface and use even, sweeping motions to cover all angles.
Let’s consider drying times again. Patience pays off as this clear coat forms the defensive layer against keys and coin abrasions. Check the can’s label for guidance, but expect to wait at least 24 hours before handling.
Next, inspect your handiwork for any missed spots or potential drips. If you do find imperfections, gently sand the area with fine-grit sandpaper then touch up with paint and clear coat as necessary.
If you’re into extra flair, this is the moment to add decorative elements. Think tiny rhinestones or subtle glitter within the clear coat for a unique twist. Ensure these additions are firmly in place before the clear coat dries.
Maintain the bag’s functionality by avoiding painting over hinges or clasps. Getting these parts stuck with paint could ruin your effort and the bag’s utility.
As you wrap up, your handbag’s metal features should have transformed, basking in their new colors and protected by your careful applications. Remember, whether it’s eye-catching bright hues or classic metal tones, your handbag is now a statement of your artistic touch.
How to maintain the painted metal on your handbag
Maintaining the painted metal on your handbag is key to ensuring your bag looks fantastic over time. First things first, handle the bag with care. Especially just after painting, the surface is more susceptible to scratches and chips.
Avoid tossing your handbag around. Treat it like a piece of art. When not in use, store it in a dust bag or a soft pillowcase to protect the paint from scratching against other objects. It’d be wise to keep it away from direct sunlight too, as UV rays can fade paint over time.
Regular cleaning is crucial. Use a soft, dry cloth to gently wipe the metal parts. If there’s dirt build-up, slightly dampen the cloth with water – never use chemicals as they might strip the paint away. Always dry the metal immediately to prevent any watermarks or corrosion.
If you do see a scratch or a chip, act fast. Touch up the paint using the same process you did initially. Apply a thin layer, let it dry, and seal it with a clear coat. This will keep the handbag looking fresh and new.
In the event you’re caught in bad weather, dry off the metal as soon as possible. Water can be an enemy to painted surfaces, and it’s important to not let it linger.
Remember to inspect your handbag regularly. Keeping an eye out for wear and tear will help you address any issues before they worsen. It’s all about quick intervention and gentle, ongoing care.
Finally, use your handbag with joy and pride. It bears your personal touch, and the effort you put into maintaining the metal will reflect your love for the piece. With these tips, you’ll ensure your customized handbag remains as stylish and striking as the day you finished it.
Conclusion
You’ve now got all the tricks up your sleeve to transform the metal on your handbag into a personalized work of art. Remember to handle your masterpiece with care and give it the TLC it deserves. With every brushstroke and protective layer you’ve added, you’re not just sprucing up an accessory; you’re making a statement. So go ahead, flaunt your handbag with its gleaming, customized metal accents. After all, it’s not just a bag anymore—it’s a reflection of your unique style and creativity. Enjoy your one-of-a-kind creation and the compliments that are sure to come your way!
Frequently Asked Questions
What is the best area to apply primer to metal details on a handbag?
For safety and best results, always apply primer in a well-ventilated area while wearing gloves. Proper ventilation helps avoid inhaling fumes and gloves protect your skin.
Which types of paint are suitable for customizing handbags?
Enamel paint, spray paint, and acrylic paint are all appropriate choices for customizing handbags. Select a paint that adheres well to metal surfaces and offers durability.
How should I apply paint to the metal details?
Apply thin layers of paint to the metal details, ensuring each layer is evenly spread. Allow each coat to dry fully before applying the next to avoid drips and uneven texture.
What is recommended for protecting the painted metal on a handbag?
A protective clear coat, such as clear enamel spray or polyurethane, is recommended. Clean the painted surface thoroughly before applying it to enhance the longevity of your handbag’s painted accents.
How long should I wait before handling the handbag after applying a clear coat?
Wait at least 24 hours after applying a clear coat before handling the handbag to ensure it is completely dry and to avoid damaging the finish.
Can I add decorative elements to the painted metal?
Yes, you can add decorative elements like rhinestones or glitter to the painted metal. These should be applied within the clear coat layer for additional flair and to ensure they adhere properly.
Should I paint over hinges or clasps on the handbag?
Avoid painting over hinges or clasps to maintain the functionality of the handbag. Painting these areas can hinder their movement or cause them to stick.
How can I maintain the painted metal on my handbag?
Maintain the painted metal by handling the handbag with care, storing it correctly, performing regular cleaning, and promptly addressing scratches or chips. Regular inspection is also important to keep the handbag in perfect condition.