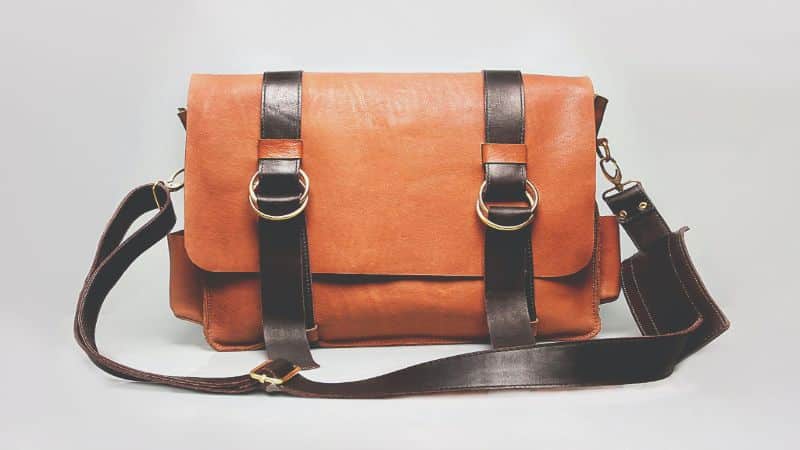
Ever glanced at your favorite handbag and noticed the corners looking a bit worse for wear? It’s no surprise; those corners take a beating day in and day out. But don’t fret—you’ve got the power to bring them back to life!
With a few simple tools and some DIY magic, you can repair those frayed edges and scuffed corners. So, grab that beloved bag off the shelf, and let’s give it the TLC it deserves. After all, a little love can make all the difference for your trusty accessory.
Assessing the Damage
Before diving into the repair work, evaluate the extent of damage on your handbag’s corners. Start by emptying your bag. Dirt and small items can obscure the true condition of the material.
Examine the corners and edges closely. Are they lightly scuffed, or are there deep scratches or tears? Light scuffing often requires minimal effort – a simple cleaning and conditioning routine may suffice.
For deeper scratches, check if the underlying material is exposed. If it is, you’ll need to be more thorough in your repair strategy, possibly requiring patches or adhesive.
Feel the material between your fingers. Is it brittle or pliable? Leather can dry out and crack, so if it feels stiff, conditioning is a must before any repairs.
Take pictures of the damage from multiple angles. This can help you track progress and ensure consistency as you work on different sections.
Assess the color fade as well. Sun exposure and wear can lead to discoloration, important to note if you’re planning to re-dye the affected area.
Lastly, consider the sentimental and monetary value. If it’s a high-priced or sentimental item, professional repair may be more appropriate. However, DIY repairs can be both effective and satisfying for less precious or budget-friendly bags.

Gathering the Tools
Once you’ve assessed the damage on your handbag, it’s time to gather the right tools for the repair job. You’ll need a few essentials to ensure the job is done effectively and the handbag returns to a presentable condition.
Essential Tools for Repair:
- Leather adhesive specifically designed for handbag materials to ensure a strong bond.
- Clamps or weights to keep materials in place while the adhesive sets.
- Fine-grit sandpaper to smooth down any rough edges before and after applying the adhesive.
- Leather dye that matches your bag’s color to touch up any color fade.
- Small paintbrushes or cotton swabs for precise application of dye and adhesive.
- Leather conditioner to restore suppleness to the repaired area after drying.
Make sure to pick tools that are suitable for the material of your handbag. For example, if you’re repairing a suede bag, use a suede brush instead of sandpaper to avoid further damage.
Prepare your work area with ample lighting and a clean surface. Cover the space with newspaper or a drop cloth to protect against spills or dye marks. Lay out your tools so everything is within reach, which will make the repair process go smoothly.
Double-check the compatibility of the products with your handbag material. Some adhesives or dyes can react badly with certain materials. Always do a patch test on an inconspicuous part of the bag before full application.
Be patient as adhesives and dyes may require time to set or dry. Rushing the repair could lead to suboptimal results, so give it the time it demands. Keep these tools on hand even after the repair; routine maintenance can extend the life of your handbag significantly.
Preparing the Handbag
Before diving into the repair process, proper preparation of your handbag is crucial. Start by cleaning the damaged area with a soft cloth and mild cleaner specifically designed for leather or the material your bag is made of. If you’re unsure about the cleaner, test it on a less visible spot first.
Assess the material’s flexibility by gently bending the edges. Rigid or brittle materials may require a specialized approach and more care during repair. If your handbag is made from fabric or synthetic material, check for fraying edges and secure them with small stitches to prevent further damage during the repair.
Empty the handbag completely to avoid adding extra weight or stress to the corners while working on them. Ideally, stuff it with paper or fabric to retain its shape but don’t overstuff; you need access to the corners.
Neutralize any moisture in the leather or material by drying it out properly after the cleaning process. Excess moisture can interfere with the adhesiveness of repair products.


« How to Protect Gold Hardware on Handbags: Shine On with These Pro Tips
Handbag Facts Unveiled: Secrets Behind Your Chic Accessory »
Once the handbag is dry, lightly sand the damaged edges with fine-grit sandpaper. This will create a better surface for adhesives and dyes to stick and ensure a smoother repair. Always sand in the direction of the material’s grain to avoid additional damage.
Protect your workspace with newspaper or a drop cloth and gather all your tools within reach. It’s also advisable to wear gloves to keep your hands clean and protect against any harsh products you’ll be using—safety first.
Check once more for any overlooked areas of damage that might need attention. It’s better to catch it now than after you’ve started the repair process. Now that your handbag is prepped, you’re ready to proceed with confidence.
Reinforcing the Corners
Once you’ve prepped the handbag and assessed the wear and tear, reinforcing the delicate corners is your next step. Start by applying a strong, flexible adhesive specifically designed for leather or the material of your bag. Be precise; you want to apply enough glue to bond, but not so much that it seeps out and causes a mess.
Next, use a thin piece of leather or fabric as a patch. Cut it to perfectly fit over the damaged corner. Gently press this patch onto the adhesive, ensuring there are no air bubbles or folds. It’s like a bandage, only for your handbag.
Then, it’s time for some pressure. Apply a small clamp or use weights to hold the patch in place. This helps the adhesive bond strongly to the handbag. You don’t need a lot of force, just enough to keep everything securely in place.
While that’s setting, consider edge paint for an added layer of protection. It works well for smoothing out rough edges and providing a finished look. Apply it carefully with a small brush; it needs to be even, so take your time.
Remember to check drying times for both the adhesive and the edge paint. Rushing can lead to subpar results, and you don’t want that. Patience is key.
Once everything is dry, go over the newly reinforced corners with fine-grit sandpaper. Aim for a smooth feel and even look.
Lastly, treat the corners with a leather conditioner. This step will restore moisture and flexibility, vital for preventing future damage. Use sparingly, though—too much can oversaturate the leather.
Now the corners are stronger, more resistant to the usual bumps and scrapes. With these reinforcements, your favorite handbag is ready for many more outings. Keep an eye on the corners occasionally; maintenance is always easier than a full repair.
Repairing Frayed Edges
When you notice frayed edges on your handbag, it’s crucial to act fast. Fraying indicates wear and can quickly escalate if not addressed. Start by assessing the type of material; leather and fabric may require different approaches.
Trim Any Loose Threads Carefully
For fabric handbags, use sharp scissors to trim any loose threads. Be careful not to cut into the bag’s fabric itself. If you’re dealing with leather, skip the trimming as it could cause more damage.
Apply a Fray Stopper or Adhesive
Next, apply a fray stopper or fabric glue on fabric handbags to prevent further unraveling. For leather, a leather adhesive specifically designed for edge repair is your best bet. Apply it in thin layers to ensure flexibility remains.
Reinforce Edges If Necessary
After the adhesive sets, you might need to reinforce the edges. Leather handbags can benefit from edge coats that seal and protect the material. Fabric handbags might require a small patch or stitching for reinforcement.
Allow Adequate Time to Dry
Patience is key. Give your handbag ample time to dry. Rushing this process can compromise the repair.
Keep a Repair Kit Handy
For future incidents, keep a repair kit handy with all the essentials. Your kit should include:
- Sharp scissors
- Fabric glue or leather adhesive
- Edge coat for leather
- A small patching kit for fabric bags
By routinely inspecting your handbag and addressing issues like frayed edges early, you’ll prolong its life and maintain its appearance. Always prioritize preventative care and routine maintenance over reactive repairs.
Blending in Scuffs and Scratches
You’ve tackled the structural repair, but what about those unsightly scuffs and scratches? Everyone will notice. It’s time to make them blend in. Start by choosing a leather dye that matches your handbag’s color perfectly. Test it on a small, inconspicuous area to ensure it looks right.
Dab, don’t swipe. Use a small paintbrush or cotton swab to apply the dye gently over the scuffs and scratches. Build the color up slowly, giving it time to dry between layers, to avoid a patchy appearance.
For deeper scratches that have penetrated the surface, you’ll need a leather filler before dying. Apply the filler as per the instructions and let it set. Sanding it down with fine-grit sandpaper will create a smooth canvas for dye application.
Once the dye is dry, protect the newly repaired area with a quality leather sealant. Not only does it protect the color, but it also provides a layer of protection against future damage. Apply it evenly with a clean cloth and watch as those blemishes become part of your bag’s character rather than unsightly marks.
Lastly, maintain the area by regularly conditioning the leather. This keeps the material supple and the color vibrant, making your repair work last.
Remember that leather is a natural material, and over time, some color variation is normal and can add to your handbag’s unique appeal. Don’t stress about perfection; instead, aim for a well-loved look that tells a story.
Keep your repair kit stocked and your bag cleaned. You never know when a new scuff or scratch might appear, and you’ll need to blend it away swiftly to keep your handbag looking its absolute best.
Finishing Touches
After meticulous repairs, giving your handbag the proper finishing touch is key to a professional and lasting result. Ensure the leather dye is completely dry, then proceed to buff the colored surfaces. You’ll want to use a soft cloth for this. Move in gentle, circular motions to bring out the shine and make the repair blend seamlessly with the original material.
If you’ve used a leather filler for deeper scratches, this step is crucial. Any excess filler should be delicately sanded away with fine-grit sandpaper before dyeing. Once this layer of paint is dry, apply a leather sealant for protection. Sealants provide a barrier against moisture and dirt, which can prolong the life of your newly repaired corners.
Next up, let’s go over the importance of regular maintenance. You’ve put in the effort to fix your handbag, so keeping it in top condition is a no-brainer. Investing in a high-quality leather conditioner is a must. This will keep the leather supple and prevent future cracks or damage. Apply conditioner every few months, or more frequently if your handbag is in heavy use.
For optimal care, store your handbag properly when it’s not in use. Stuff it with a soft material to maintain its shape and keep it in a dust bag or a breathable container. Keep your handbag away from direct sunlight, heat, and humidity which can cause fading and deterioration.
Lastly, don’t forget about the hardware. Polish any metal areas such as zippers, clasps, and buckles with the appropriate cleaners. Shiny, well-tended hardware can make a handbag look brand new even if it’s seen years of love.
Remember, the longevity of your handbag largely depends on the love and attention you give it after the repair. Regular care is the best way to ensure your handbag stays in perfect shape for years to come.
Conclusion
So there you have it! With a little bit of elbow grease and tender loving care, your favorite handbag can be restored to its former glory. Remember, the key to a successful repair is not just in the restoration process itself but in the ongoing care that follows. Treat your rejuvenated accessory to regular conditioning and proper storage, and you’ll ensure it stays by your side, turning heads for many more outings to come. Here’s to giving your beloved handbag a new lease on life!
Frequently Asked Questions
What is the best way to finish a handbag repair?
The best finish for handbag repair includes buffing the colored surfaces with a soft cloth to enhance the shine and ensure the repair blends with the original material. Applying a leather sealant for protection is also important.
How should excess filler be handled during handbag repair?
Excess filler should be carefully sanded away before dyeing to make sure the surface is smooth and the repair looks professional.
Why is using a high-quality leather conditioner important?
Using a high-quality leather conditioner is crucial as it helps keep the leather supple, preventing future cracks or damage and extending the life of the handbag.
What is the recommended way to store a handbag when not in use?
When not in use, the handbag should be stored properly in a clean, dry place away from direct sunlight and extreme temperatures to maintain its shape and material integrity.
How often should I polish the metal areas of my handbag?
Polishing the metal areas of your handbag should be done regularly to prevent tarnishing and to keep the hardware looking shiny and new.